CNC Turining Defect Detention: possibilities and Process
Sratches
Linear marks on the shiny surface caused by abrasive contact.
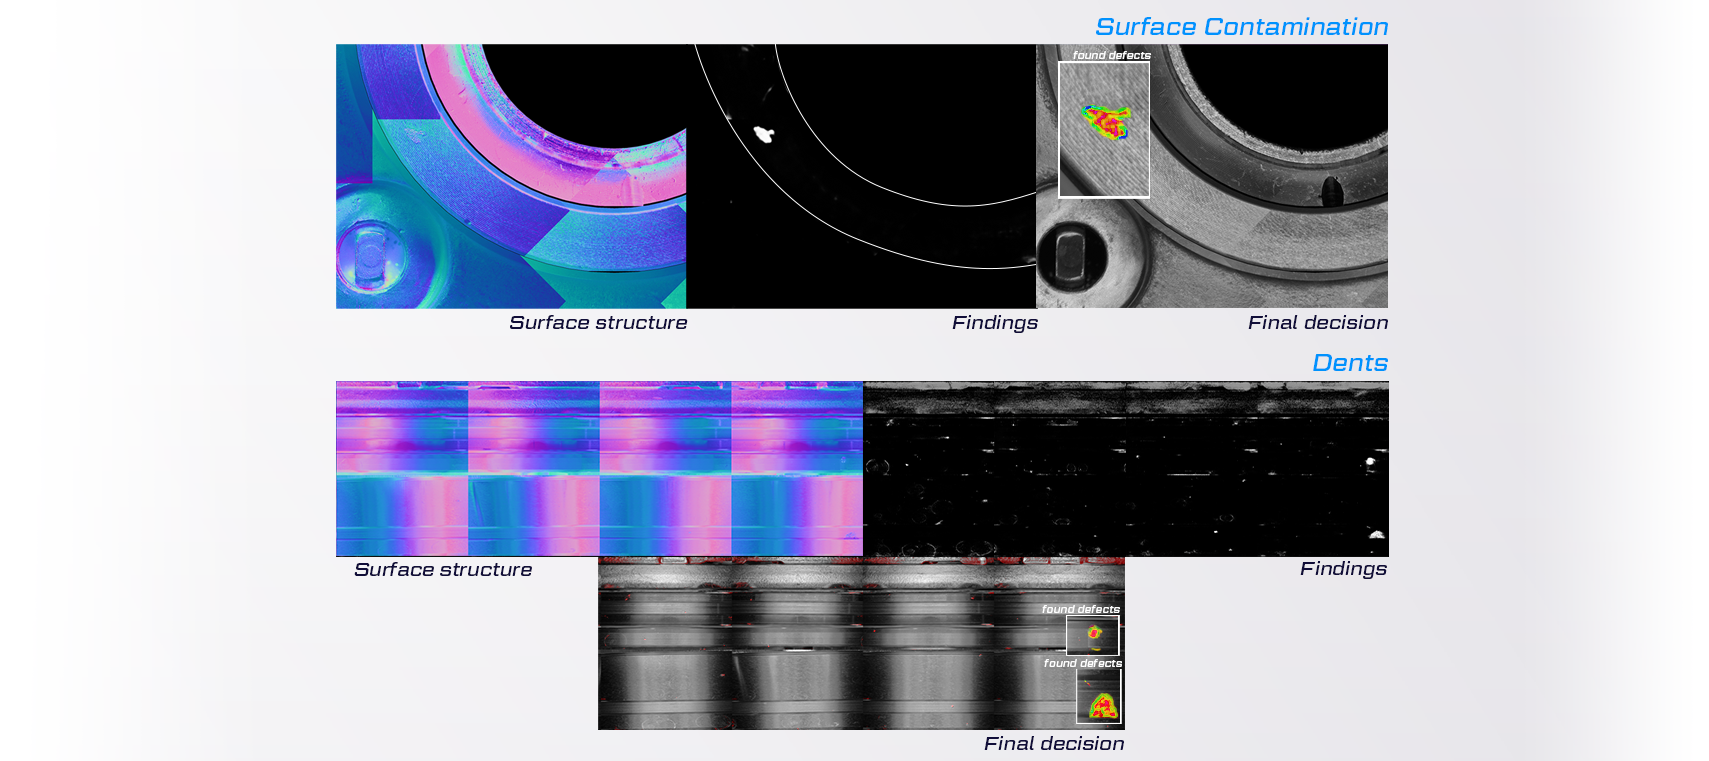
Dents
Depressions or small indentations in the surface.
Polishing Defects
Irregularities or uneven politishing on the surface.
Surface Contamination
Foreign particles or substances adhering to the surface.
Dimensional Inaccuracy
Parts not meeting specified dimensions or having deviations.
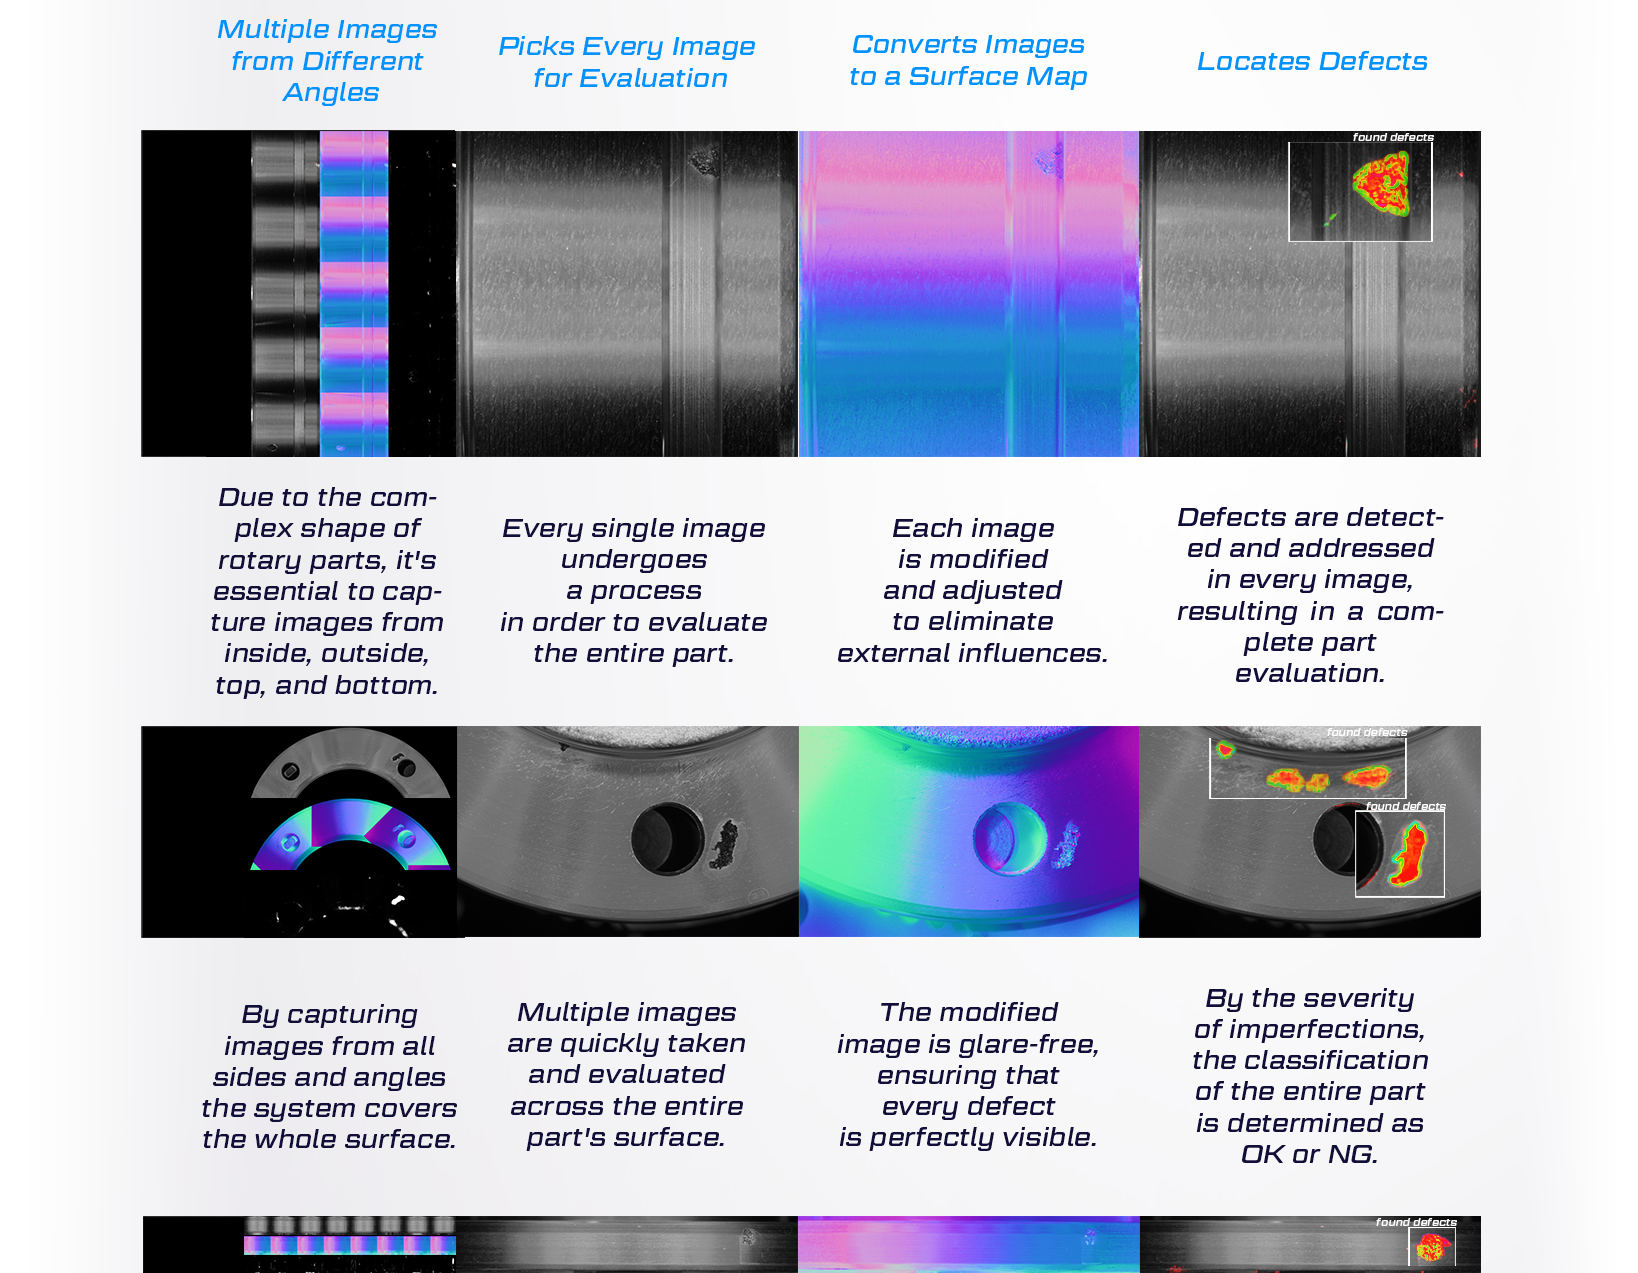
Inspecting rotary surfaces, particularly very shiny inner and outer cylindrical surfaces, presents a unique set of challenges. The reflective properties of these surfaces can create intense glare, making defect detection difficult.
To overcome these challenges, advanced camera systems are programmed to capture images from all sides of the part, effectively creating a comprehensive map of its entire surface. These images are then processed in multiple layers to remove glare, ensuring a clear and accurate view of the part. This multi-layer approach eliminates the influence of reflections and shadows, allowing for precise and reliable defect detection.
By thoroughly examining every aspect of the cylindrical component, this innovative technology ensures that even the subtlest imperfections, such as porosity, burrs, scratches, or dents, are detected with the utmost precision, contributing to a more rigorous and efficient quality control process in manufacturing.


